I always had this problem when it comes to comparing hair Before After photos.
I get people sending me first photo with more length, different combing style, different camera, different lighting and the subsequent photos with totally different length, camera, combing style, lighting etc etc.
When it happens, when you can’t really compare 2 pictures, but the person says that he had seen density improvement or regrowth, you can imagine my frustration. I get such not so comparable pictures all the time.
I requested one of my clients who is Professional Photographer to teach us how one can take such comparable pictures without buying any expensive equipment, lighting etc etc.
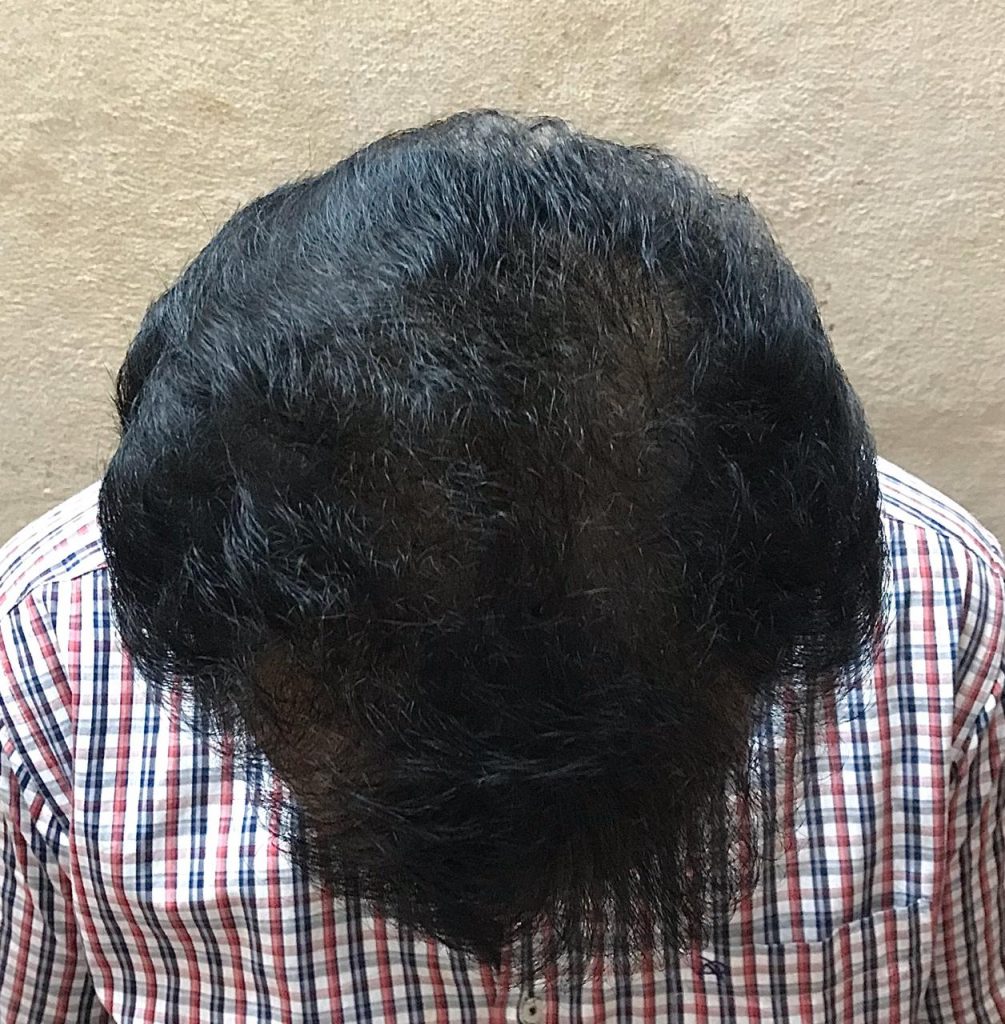
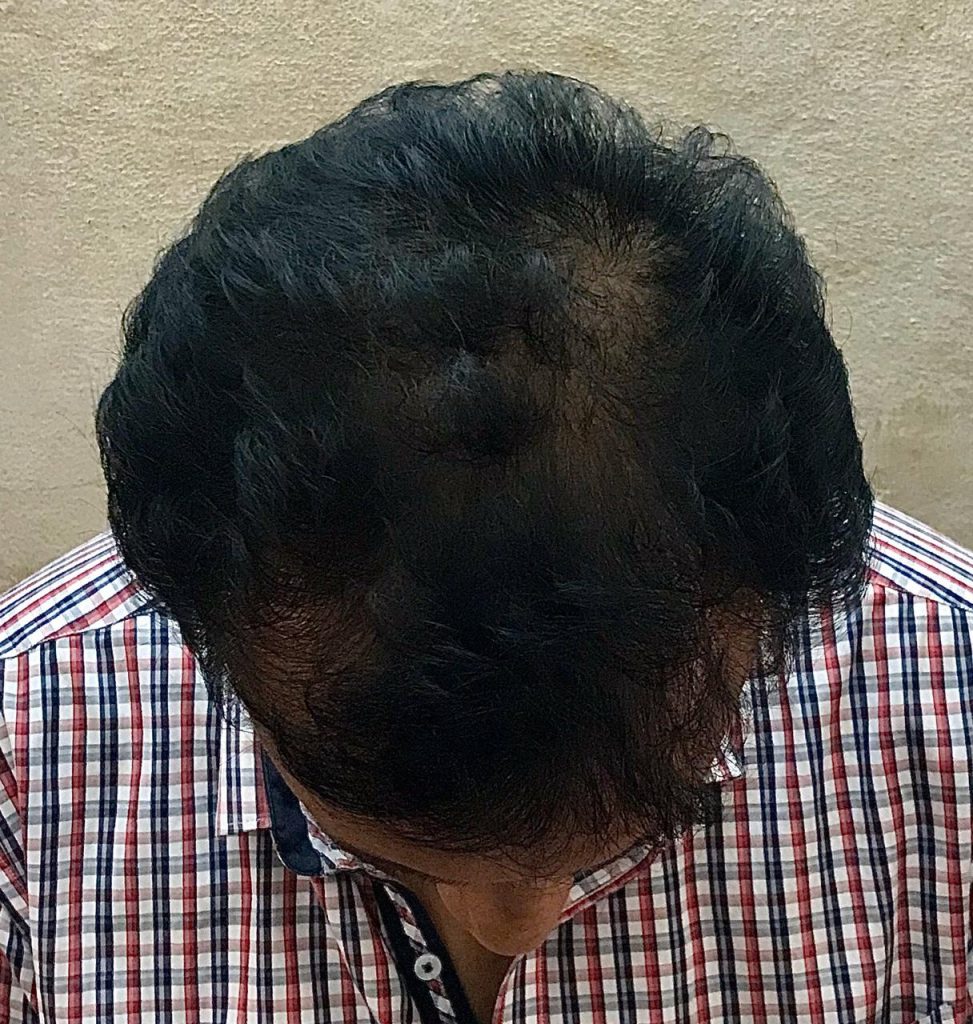
He has personally seen the improvement with his hair in matter of 2-3 months. He is approaching 60 years. Look at his photos

Here is the procedure he sent me.
First Video is made under direct florescent light and there after a pic taken in the same setup, for the second Video same setup but a tenting with white cloth was made in between the light and the object (Head) remaining everything is same, a Video and a photograph is also done for the same setup,you can notice the difference between the two photographer’s in the first pic you can see shiny patches on the hair whereas in the second photo the shiny patches are not that visible, so in this way if you can do the details of the hair will be more visible,my intention is to show you the technique and suggest you to do it under sunlight in the same way, so that the details of the hair will be better, but while doing this please follow these steps, the sunlight should be 45°to 65°from the right side of the object (Head) the background and the dress of the person should be dark because most of the camera’s of the mobile phones are set in auto mode the exposure may change if the background or dress is light in color, the camera may take exposure for lighter colors and the main part(Hair) will become more darker and the details will be lost, since the details of the hair is important most of the photograph should be the head,the cloth that you use for tenting should be white and two to three feet above the object (Head) parallel in between the light and head, it will be better if you take help from someone to hold the four sides of the cloth or fix it accordingly. This Video and photos are done with a lower end mobile phone.
So, now you know how to take correct photos, go and read my advice, take your first photo using this method, send it to me.
- How I started reversing my Male Pattern Baldness Naturally ?
- Diffuse Hair Loss : Get More Vitamin B6
- How to reverse Hypothyroidism induced Pattern Hair Loss ?
If you want me to help you personally, if you want to see results what others have achieved, check it out Hair Regrowth Blueprint.